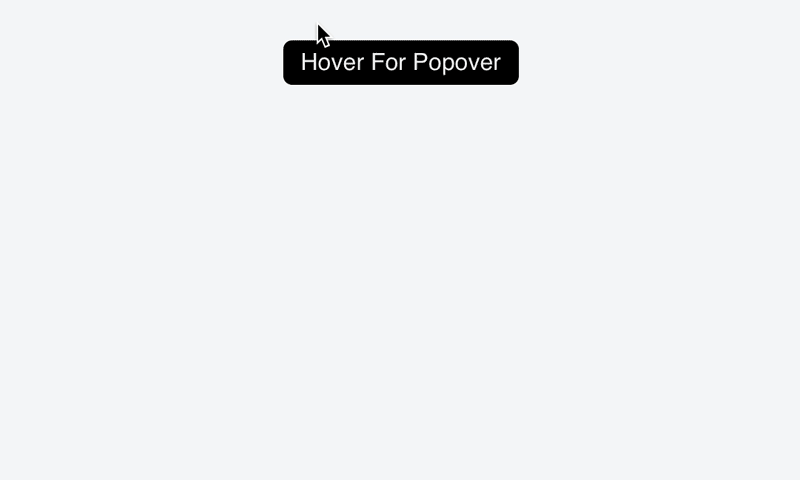
Creating custom UI behavior in Angular can seem daunting. Once you know how to break the problem down, its complexity can just fizzle away. In this tutorial, we’ll be exploring the use of mouse events, locations, and some simple geometry to add an on-hover popover menu to a button. Not just any simple on-hover behavior, but one that stays open if the user is heading toward the content.
I want to point out I am not the first person to write about this behavior, and I’m not the first to discuss implementations. This UI concept has been around for years, and has been implemented in many different ways by many different people. It’s a fun problem with multiple right answers, and a great example to explain custom UI behavior in AngularJs.
Let’s break it down!
We can divide the work for this popover into easily doable pieces:
- When the cursor hovers over the button ➤ show the popover.
- The cursor moves toward the popover ➤ popover stays open.
- The cursor moves away from the popover ➤ popover closes.
- The cursor can select an item in the popover.
By breaking the flow down, we can plan out the events we need to make the behavior. We’ll also look at how to divide the behavior into distinct states, so we can make a flow diagram.

From this, we see three places where we need to “make decisions”:
- Is the cursor on the button?
- Is the cursor heading toward the popover?
- Is the cursor on the popover?
Using on-mouse events, we can translate this flow into checks and events, like this:
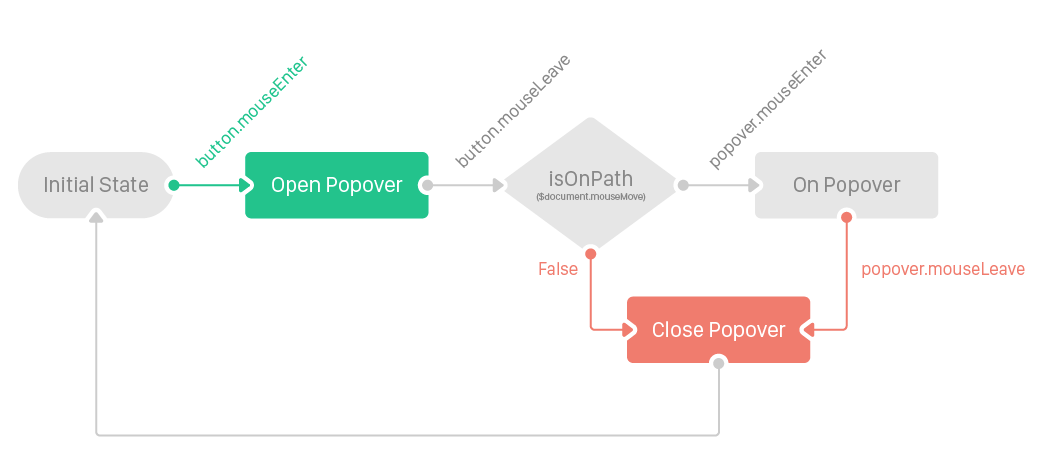
That doesn’t look too hard to implement! Figuring out if the cursor is on the path is a little trickier, so let’s mock that out for now as isOnPath. For the easy part, we’ll work on mouse events on the popoverElement and the buttonElement.
First, let’s make the onButtonEnter method. This method will be attached to the button.on(‘mouseenter’) listener when the directive is loaded:
buttonElement.on('mouseenter', onButtonEnter);

function onButtonEnter(e) {
  // given function to open the popover
  openPopover(e);
  // transition to leave-button state
  buttonElement.one('mouseleave', onButtonLeave);
}
Once the cursor leaves the button, we need to:
function onButtonLeave() {
  // transition to the popover state
  popoverElement.one('mouseenter', onPopoverEnter);
  // listen to the mouse movement on the document to check the path
  $document.on('mousemove', isOnPath);
};
Then we need to fill in the events for the popover. When the popover is entered, we need to:
function onPopoverEnter(e) {
  // stop listening to the path because we made it to the destination
  $document.off('mousemove', isOnPath);
  // Add a listener to the mouse leave so we can hide the popover
  popoverElement.one('mouseleave', hidePopOver);
}
When closing the popover, we should try to clean up everything that we can.
function cleanupPopover() {
  // this is called in the closePopover() function
  // remove all listeners from the popover
  popoverElement.off('mouseleave');
  popoverElement.off('mouseenter');
  // stop listening to the mouse movement on the document
  $document.off('mousemove', isOnPath);
}
Now the tricky part.
How do we figure out the user is heading toward the popover? We’re going to keep it simple, by making a shape between the button and the popover, and validating if the cursor is inside.
First, we need to define our shape. The vertices of the shape depend on the location of the popover relative to the button (top, right, bottom, or left)
To make the vertices easy to access, we’ll lay them out into objects.
var popoverClientRect = popoverElement[0].getBoundingClientRect();
var elementClientRect = element[0].getBoundingClientRect();

var popoverRect = {
 topLeft : [popoverClientRect.left, popoverClientRect.top],
 topRight: [popoverClientRect.right, popoverClientRect.top],
 bottomLeft : [popoverClientRect.left, popoverClientRect.bottom],
 bottomRight: [popoverClientRect.right, popoverClientRect.bottom]
};
var elementRect = {
 topLeft : [elementClientRect.left, elementClientRect.top],
 topRight: [elementClientRect.right, elementClientRect.top],
 bottomLeft : [elementClientRect.left, elementClientRect.bottom],
 bottomRight: [elementClientRect.right, elementClientRect.bottom]
};
To tell the popover where to be in relation to the button, we add the classes top, right, bottom, or left. We can check if the class exists on the popover, and use that to figure out the shape. Using this, we can return the arrays.
function getPath() {
  if (popoverElement.hasClass('bottom')) {
    return [
      elementRect.topLeft,
      popoverRect.topLeft,
      popoverRect.topRight,
      elementRect.topRight
    ];
  }
  if (popoverElement.hasClass('top')) {
    return [
      popoverRect.bottomLeft,
      elementRect.bottomLeft,
      elementRect.bottomRight,
      popoverRect.bottomRight
    ];
  }
  if (popoverElement.hasClass('left')) {
    return [
      popoverRect.bottomRight,
      popoverRect.topRight,
      elementRect.topRight,
      elementRect.bottomRight
    ];
  }
  return [
    elementRect.topLeft,
    elementRect.bottomLeft,
    popoverRect.bottomLeft,
    popoverRect.topLeft
  ];
}
Now that we have our shape, we need a way to check if the cursor is in it. There are a few existing libraries for this, so we’ll use this one that I found a while back. It takes an array of [x,y] values for the point, so it’s perfect. All that we have left to implement is isOnPath:
function isOnPath(event) {
  var path = getPath();
  if (!pointInPolygon([event.clientX, event.clientY], path)) {
    hidePopOver();
  }
}
The key to solving any problem is breaking it down into the smallest possible problems, and solving those one at a time. And that’s about it! Below, I’ve added a JSFiddle with the implementation. Try it out and play with it!